


Front seats
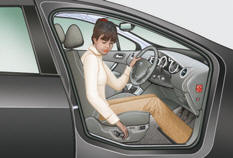
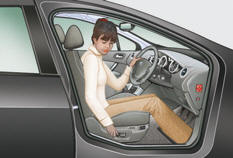
Seat consisting of a seat cushion, a seat back and a head restraint which can all be adjusted to adapt your position for ease of driving and comfort.
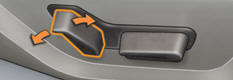
Driver's seat electric adjustments
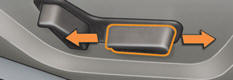
Forwards-backwards
Push the control forwards or rearwards to slide the seat.
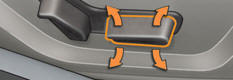
Cushion height and angle
Tilt the rear part of the control upwards or downwards to obtain the required height.
Tilt the front part of the control upwards or downwards to obtain the required angle.
 The electrical functions of the
driver's seat are deactivated approximately one minute after the ignition is switched
off.
The electrical functions of the
driver's seat are deactivated approximately one minute after the ignition is switched
off.
To reactivate them, switch on the ignition.
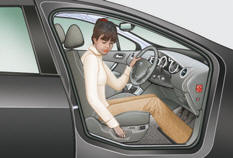
Seat back angle
Tilt the control forwards or rearwards to adjust the angle of the seat back.
Additional adjustments
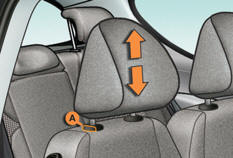
Head restraint height adjustment
To raise the head restraint, pull it forwards and upwards at the same time.
To remove the head restraint, press the lug A and pull the head restraint upwards.
To put the head restraint back in place, engage the head restraint stems in the openings keeping them in line with the seat back.
To lower the head restraint, press the lug A and the head restraint at the same time.
 The head restraint is fitted with
a frame with notches which prevents it from lowering; this is a safety device in
case of impact.
The head restraint is fitted with
a frame with notches which prevents it from lowering; this is a safety device in
case of impact.
The adjustment is correct when the upper edge of the head restraint is level with the top of the head.
Never drive with the head restraints removed; they must be in place and adjusted correctly.
Manual lumbar adjustment
Turn the knob to obtain the desired level of lumbar support.
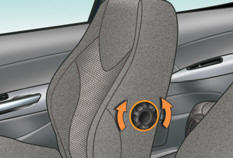
 Table position for front passenger
seat
Table position for front passenger
seat
Placing this seat in the table position, with the rear seats also in the table position, allows you to transport long objects.
Pull the control upwards to fold the seat back onto the seat cushion.
To lower the seat back fully, tilt the seat back angle adjustment control.
Pull the control again to release the seat back and raise it.
When put back in place, the seat back returns to its initial position.
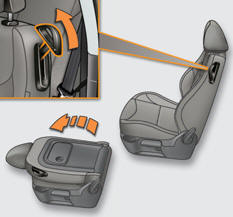
Do not forget to fold the "aircraft"
type table fixed on the back of the seat first.
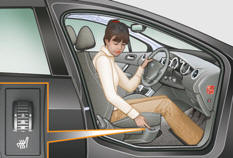
Heated seats control
With the engine running, the front seats can be heated separately.
Use the adjustment dial, placed on the side of each front seat, to switch on and select the level of heating required:
0 : Off.
1 : Low.
2 : Medium.
3 : High.
Storing driving positions
System which registers the electrical settings of the driver's seat and door mirrors. It enables you to store and recall two positions using the buttons on the side of the driver's seat.
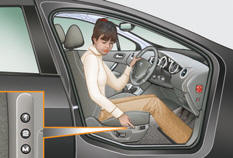
Storing a position
Using buttons M / 1 / 2
Switch on the ignition.
Adjust your seat and the door mirrors.
Press button M , then press button 1 or 2 within four seconds.
An audible signal indicates that the position has been stored.
Storing a new position cancels
the previous position.
Recalling a stored position
Ignition on or engine running
Press button 1 or 2 to recall the corresponding position.
An audible signal confirms that adjustment is complete.
You can interrupt the current
movement by pressing button M , 1 or 2 or by using one of the seat controls.
A stored position cannot be recalled while driving.
Recalling stored positions is deactivated 45 seconds after switching off the ignition.
See also:
Front seats with manual adjustments
Seat consisting of a seat cushion, a seat back and a head restraint which can
all be adjusted to adapt your position for ease of driving and comfort.
Forwards-backwards
Raise the control and slide ...
Sequential mode
After starting the vehicle, select position M to change to sequential mode.
AUTO disappears and the gears engaged
appear in succession in the instrument panel.
The gear change commands are only c ...
Fuel tank
1. Opening the fuel filler flap.
2. Opening and hooking the fuel filler cap.
The type of fuel to be used is indicated on the inner face of the fuel filler
flap.
Capacity of the tank: approximat ...