



Boot fittings (308 SW with bench rear seat)

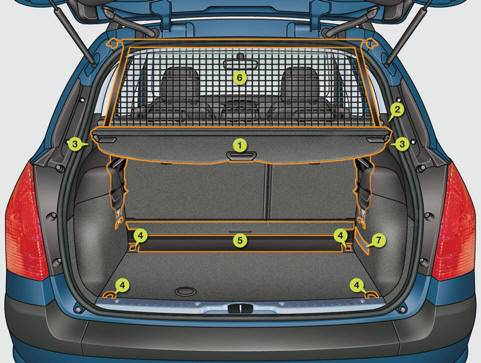
1. Rear parcel shelf (see details on following page)
2. 12 V accessories socket (see details on following page)
3. Hooks (see details on following page)
4. Stowing rings
5. Storage tray
6. High load retaining net (see details on following page)
7. Luggage retaining strap
Rear parcel shelf
This consists of four sections three of which can be folded back on each other.
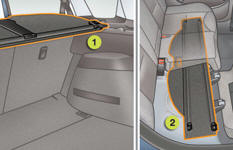
There are several options for storing the rear parcel shelf:
- either folded back on itself near the rear seats (1),
- or folded back on itself and stored in a location provided under the rear seats
(2).
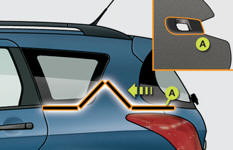
To fold it from the boot:
unclip the load space cover from its side supports,
take hold of the load space cover by its handle A,
fold it concertina-style to the rear seats.
To unfold it from the boot:
take hold of the load space cover by its handle A,
unfold it to the boot pillars,
clip the load space cover on its side supports.
 Maximum loads
7.5 kg, rear parcel shelf unfolded with high load retaining net at row 2.
Hooks
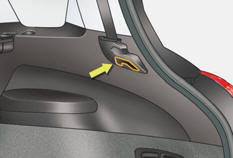
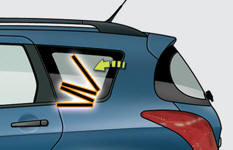
The hooks can be used to hold shopping bags.
High load retaining net
Hooked onto the special upper and lower fixings, this permits use of the entire loading volume up to the roof:
- behind the rear seats (row 2),
- behind the front seats (row 1) when the rear seats are folded.
When positioning the net, check
that the strap loops are visible from the boot; this will make slackening or tightening
easier.
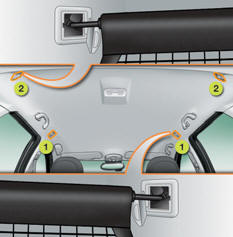
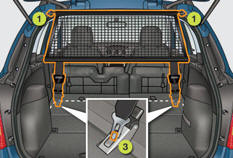
To use it in row 1:
open the covers of the upper fixings 1,
unroll the high load retaining net,
position one of the ends of the net's metal bar in the corresponding upper fixing
1 , then do the same with the other end,
slacken the straps fully,
fix the snap hook of each of the straps on the corresponding bar 3, located under
the cushion of the rear seats,
fold the rear seats,
tighten the straps,
check that the net is hooked and tightened correctly.
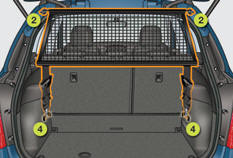
To use it in row 2:
fold or remove the load space cover,
open the covers of the upper fixings 2,
unroll the high load retaining net,
position one of the ends of the net's metal bar in the corresponding upper fixing
2 , then do the same with the other end,
fix the snap hook of each of the
straps in the corresponding ring 4 , located on the rear seats mechanism support,
tighten the straps,
check that the net is hooked and tightened correctly.
This net can be stored in the
storage tray on the floor.
See also:
Starting the vehicle
Insert the key in the ignition switch.
The system recognises the starting code.
Turn the key fully towards the dashboard to position 3 (Starting) .
When the engine starts, release the key.
...
Warning lamps
The other warning lamps appear only in this instrument panel.
The illumination of certain warning lamps may be accompanied by an audible signal;
an additional message is still displayed in the ...
Automatic gearbox
The gearbox does not require any maintenance (no oil change). Refer to the servicing
booklet for details of the level checking interval for this component. ...